
The first step was to install a part of the OSB wall, which is practically obligatory in Germany. Yes, I can already hear some grumbling:
“OSB, did the guy really say O-S-B? Oh no, not OSB again”.
Yup, I plead guilty. OK, there are really more beautiful things than OSB, no question. E.g. plastering the wall, painting and working with nice tool cabinets, or putting in drywall, etc. pp.. It’s just that this would have been all too expensive and too much work for me. You know – pragmatic approach and all that. And OSB is one of the cheapest and easiest methods to get a wall even and preped for use. At first, I only started next to the door to get the new, provisional electrical system installed. I also mounted the first LED lights on the ceiling. First I screwed a 4x6cm square timber to the ceiling and on top of it the cheapest LED damp room lights I could get.

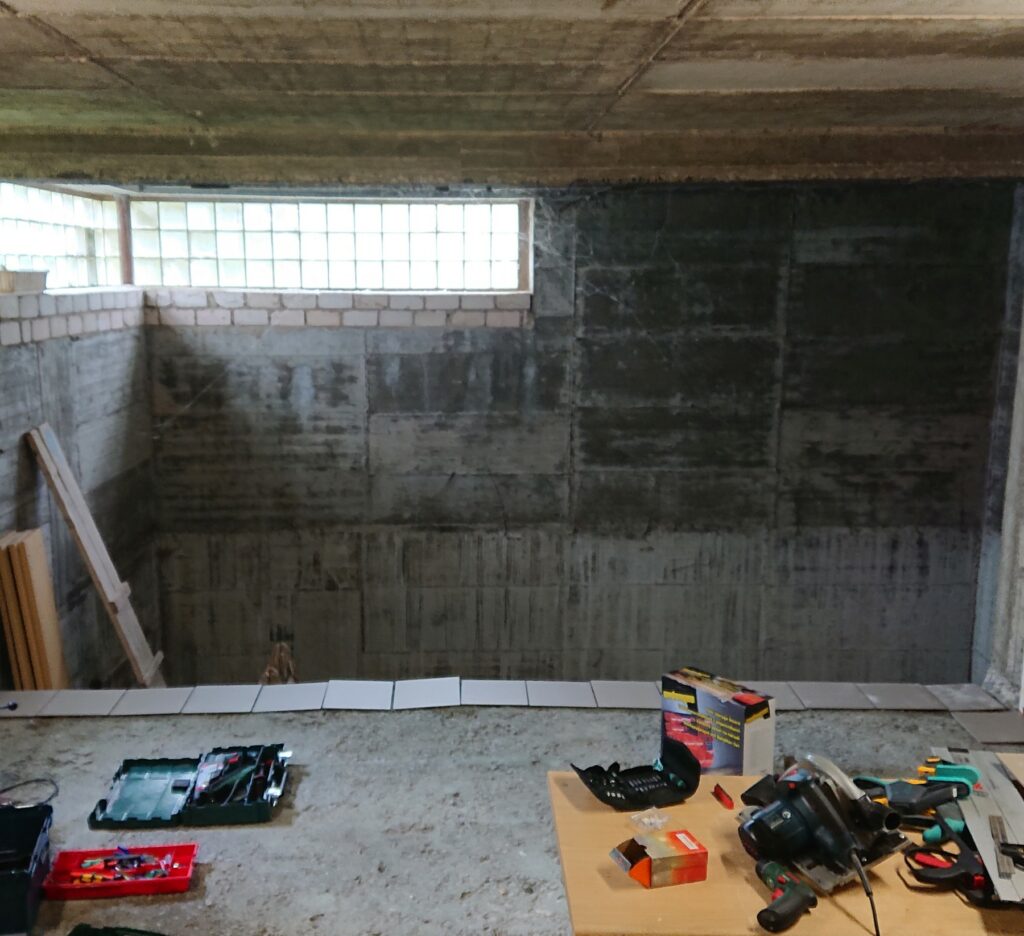
Next, the floor had to be made flat. It wasn’t usable at all, since it consisted of very rough concrete:

The original idea was to tile the floor with very simple porcelain (?) stoneware. So off to the Hornbach hardware store and made the car full. Fortunately, the VW has a good 500kg payload …

However, it turned out very quickly that this would not work. Due to the enormous (un)depths in the floor so much tile adhesive would have been necessary to compensate, that I could have laid the floor from the cost of the same with oak parquet. After the first row of tiles at the edge of the pool, I stopped the action.
Good advice was then fortunately not expensive. The unused tiles went back again, which worked surprisingly smoothly and I got my money back. The cheapest for me practicable solution I got recommended in OBI Hardware Store – not exactly known for low prices. They recommended the cheapest liquid screed they had there. For my purposes, to get a reasonably even floor, actually perfectly adequate. So I loaded up a few bags and headed home. The following weekend, I joined with my wife in pouring out the floor. She mixed the stuff in one of two big buckets and then I spread the mass.

The spreading actually went quickly. A few tips for such an action:
- Work at least with one partner, otherwise you can not keep up with the material and the mixing times.
- I used around 20% more water than was indicated on the packaging. I have relied on the reviews in the OBI online store, they had recommended it like this.
- Have a nail roller ready to roll out the air bubbles.
- Do not forget your Rubber boots, because you can not get around to wade through it.
After less than 1 1/2 hours we were done and the result looked really good. Already the next day you could walk on it and it was immediately clear that the floor was perfectly even enough for me. In 2-3 places there is something sticking out (former drain pipes, small stones, etc.), but nothing that would hinder me in my work. After one more day, the floor was resilient enough for me to put my stuff back in.
So I could continue with the furnishing. On the walls I mounted cheap 4x6cm squared lumber again, my standard go-to lumber for tinkering with anything. These were screwed vertically to the walls, i.e. drill holes in the wall, dowels in and then screwing the wood to it. On these squared lumber then came the OSB boards. I used very simple OSB slot-and-spring boards (is that the correct name?) measuring 205×62.5cm with a thickness of 12mm. Fortunately, the room is cut in such a way that I had almost no waste with the boards.
I then installed workbenches all around. The frames for these are made of overleafed 4x6cm squared lumber, and I used OSB slot-and-spring panels 21mm thick as the work surface. This gives me a working depth of 62cm, which is just right for my purposes. Unfortunately I don’t have any photos of the construction in progress, only these here:

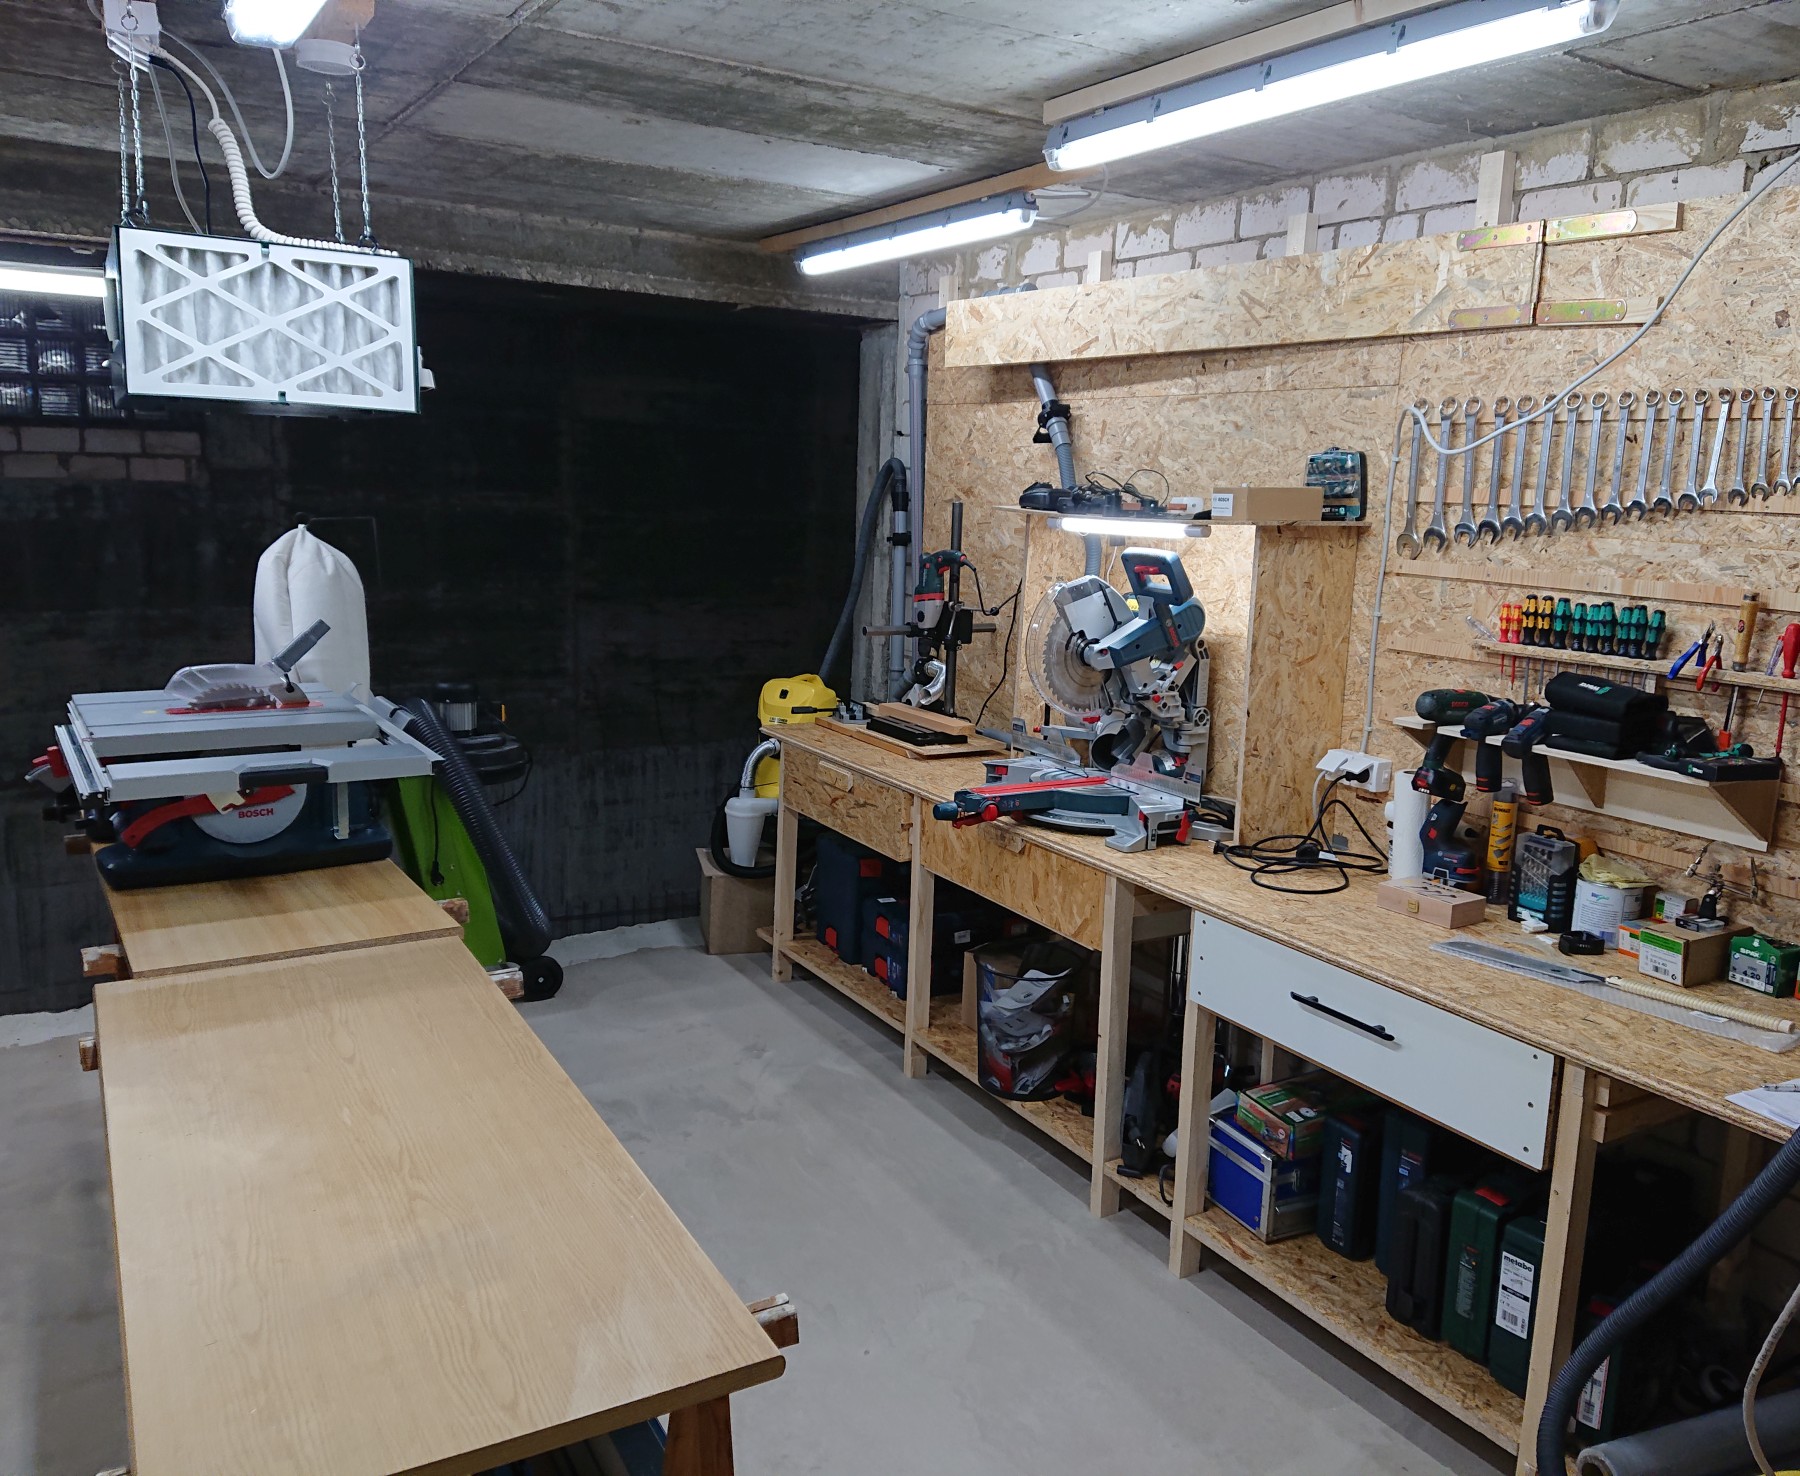
As you can see, I was a bit further along. Of course, French Cleat ist not missing 😉 In particular, a “few” machines have already moved in there. However, at that time I still had no real workbench, among other things. And the stairs down into the basin didn’t exist yet either. Both, and some more, I explain in the coming articles.
Be First to Comment