A replacement home is needed
Every year I get a visit from a squirrel, which always tries to build a nest on the window sill in front of my guest bathroom. Since the window has to be opened for airing, this is of course not a suitable place for several reasons. On the other hand, it always hurts that I have to destroy the nest. That’s why I decided to build a replacement for the little rascal. And while I’m tinkering, I thought it might be fun to watch the new inhabitants being raised. Therefore, a webcam should be installed at the same time.
Material
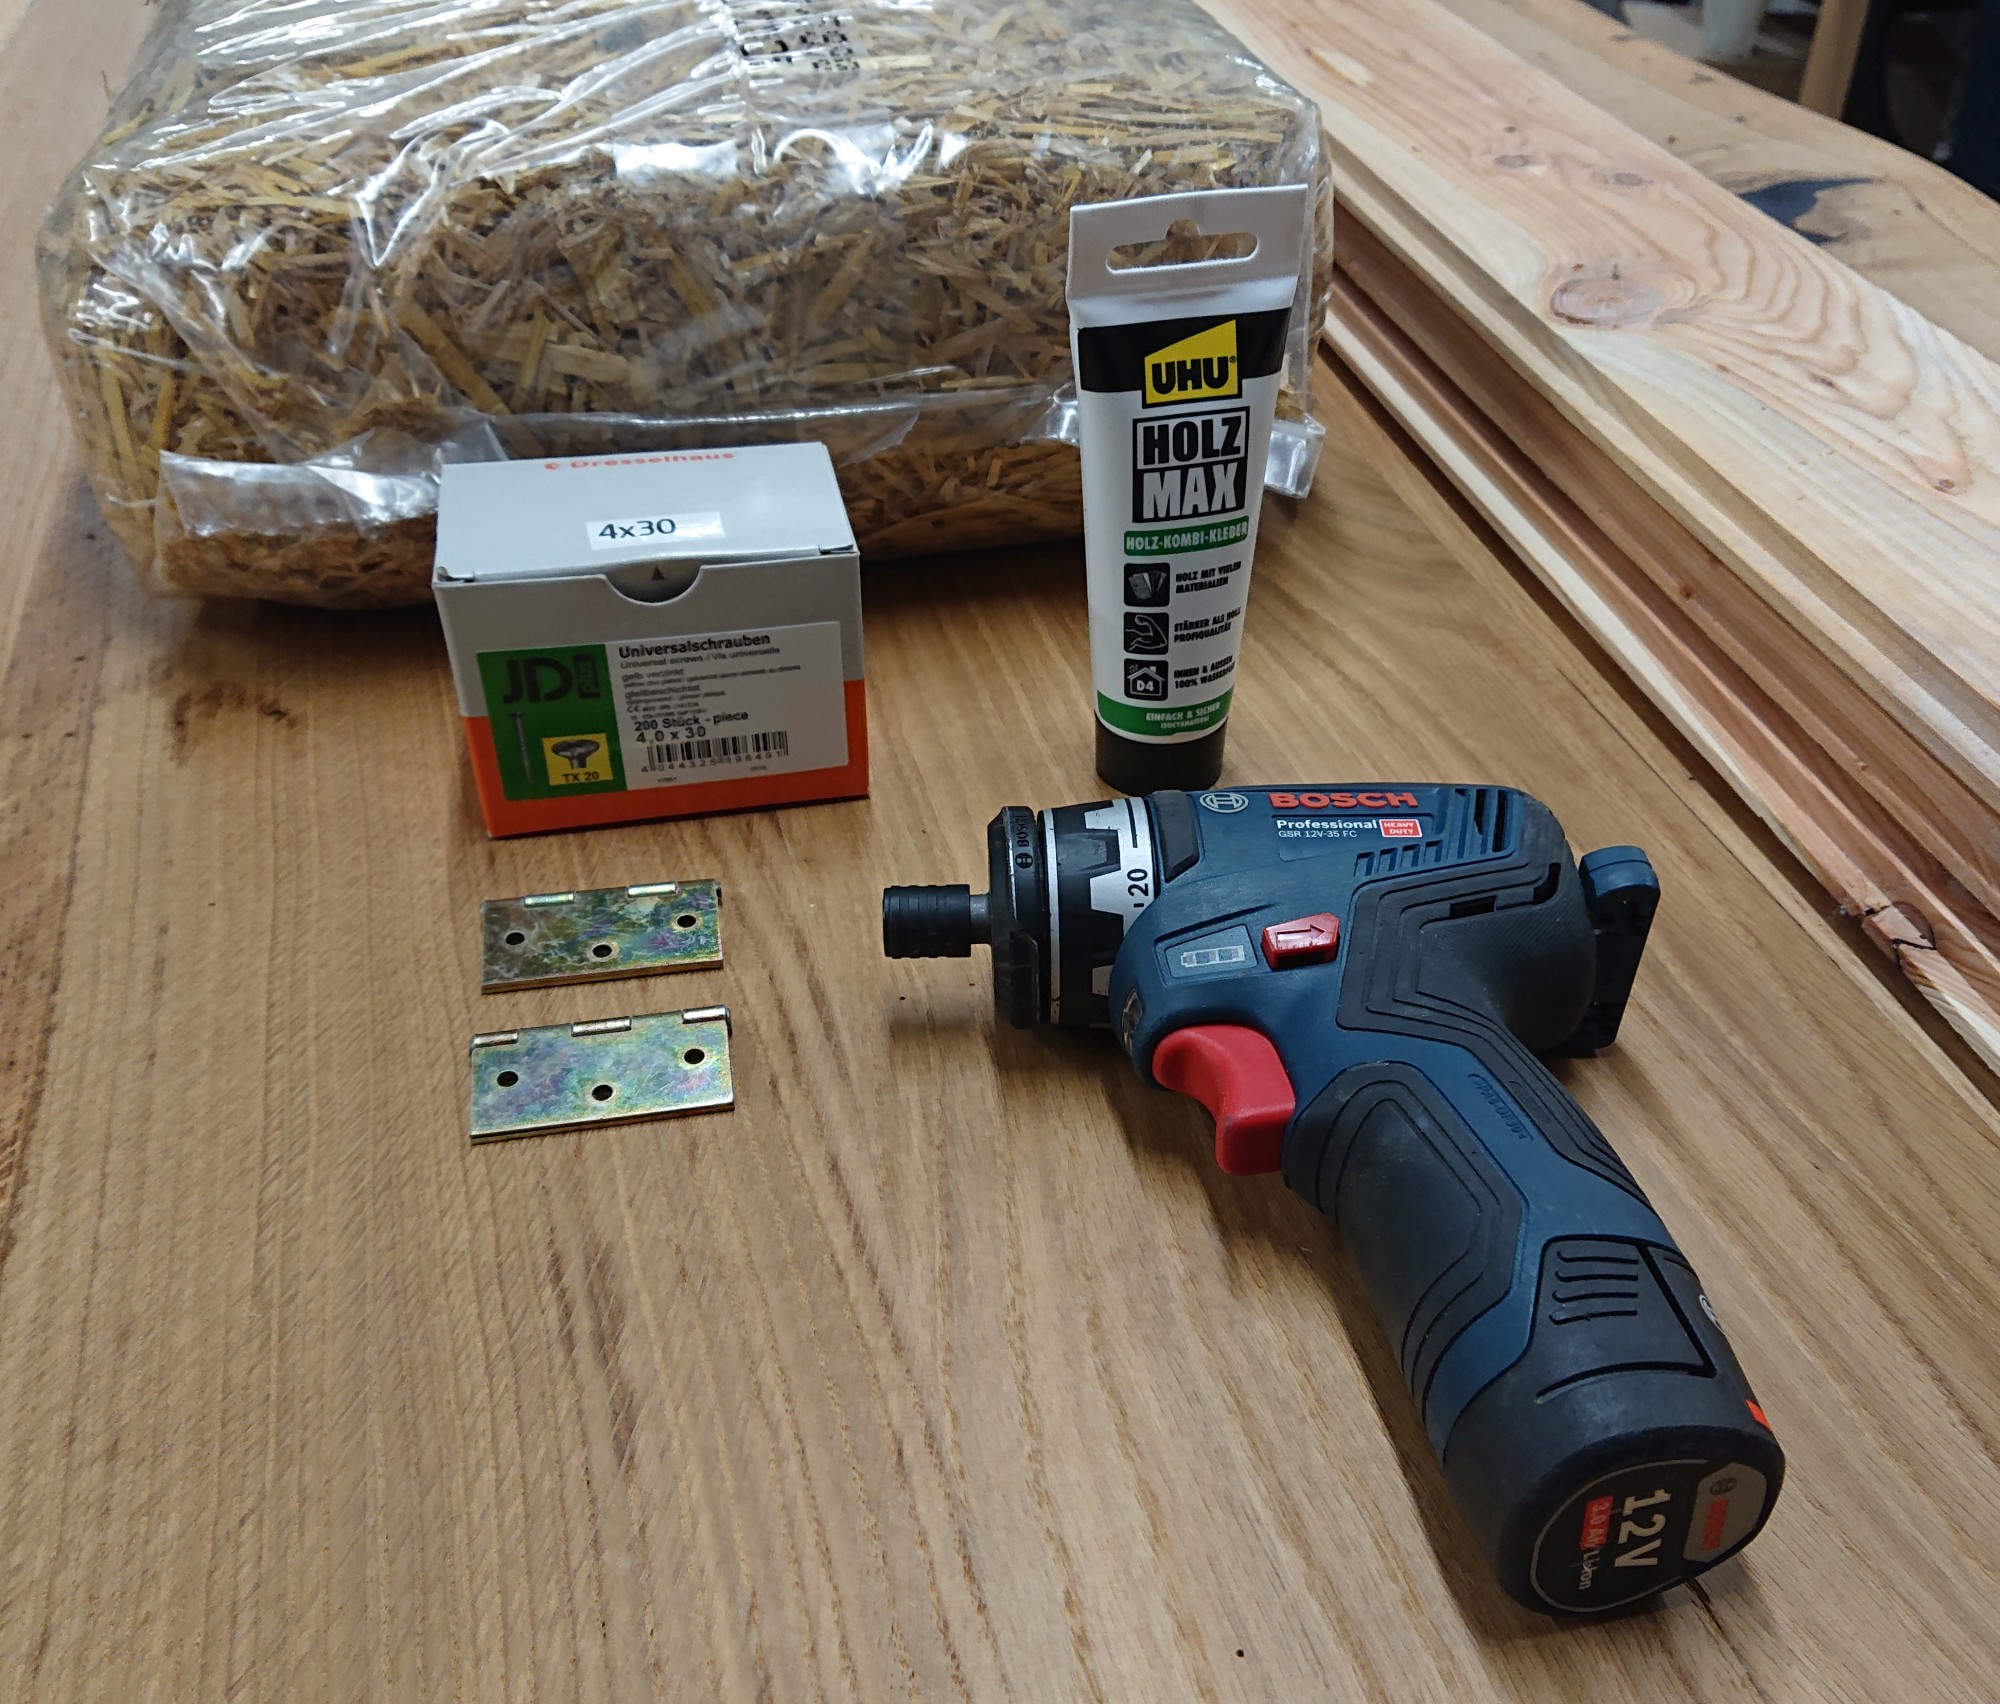
As building material I took very simple Rauspund Douglas fir boards 200×11.6×2.1 cm with slot and spring from the hardware store. I made sure that they were as straight as possible, but as it is with wood from the hardware store, I did not succeed 100%. For this project, however, this is not so important, with a little “force” and enough glue you can compensate. Since the whole thing is exposed to the weather, I needed a waterproof glue or adhesive that meets the “D4”-standard. Since I do not build much for outdoor I did not want to buy a large amount of glue and decided to buy a tube of “UHU Holz Max” wood glue. This meets the “D4” standard and I don’t have to throw away too much in case I can’t use the rest elsewhere in the near future.
I have linked most of the materials and tools used at the end of the post when possible.
I used this build guide from the Najuversum as a guide. I adjusted the measurements so that I got there width-wise with the boards I used. For the side parts I glued 2 boards together, for the rest 3 boards.
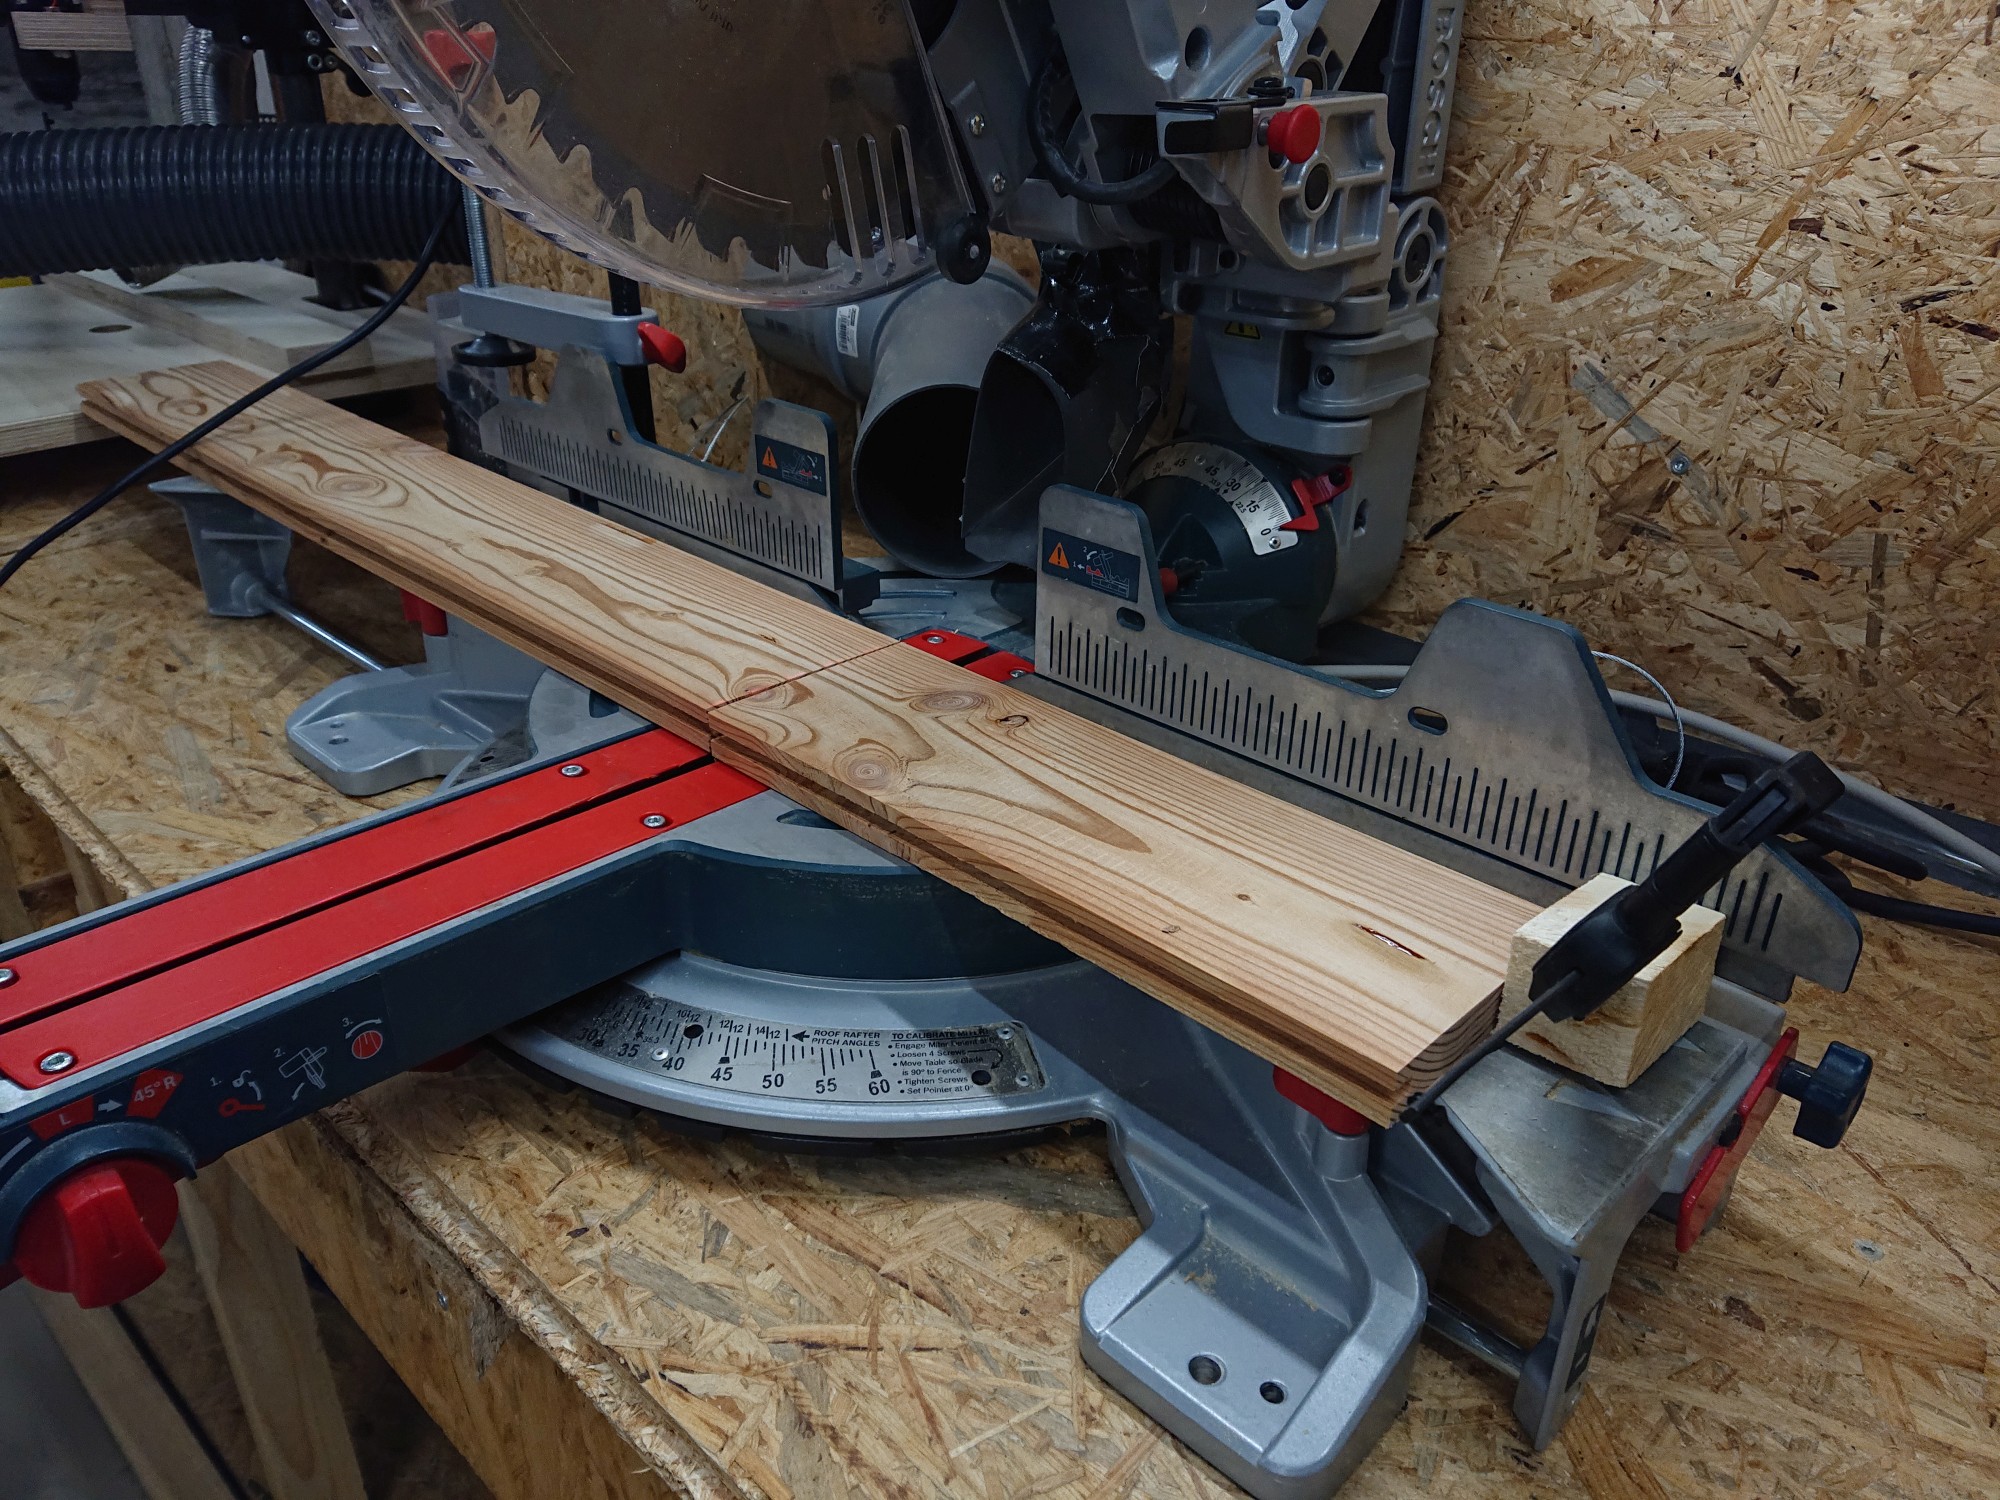
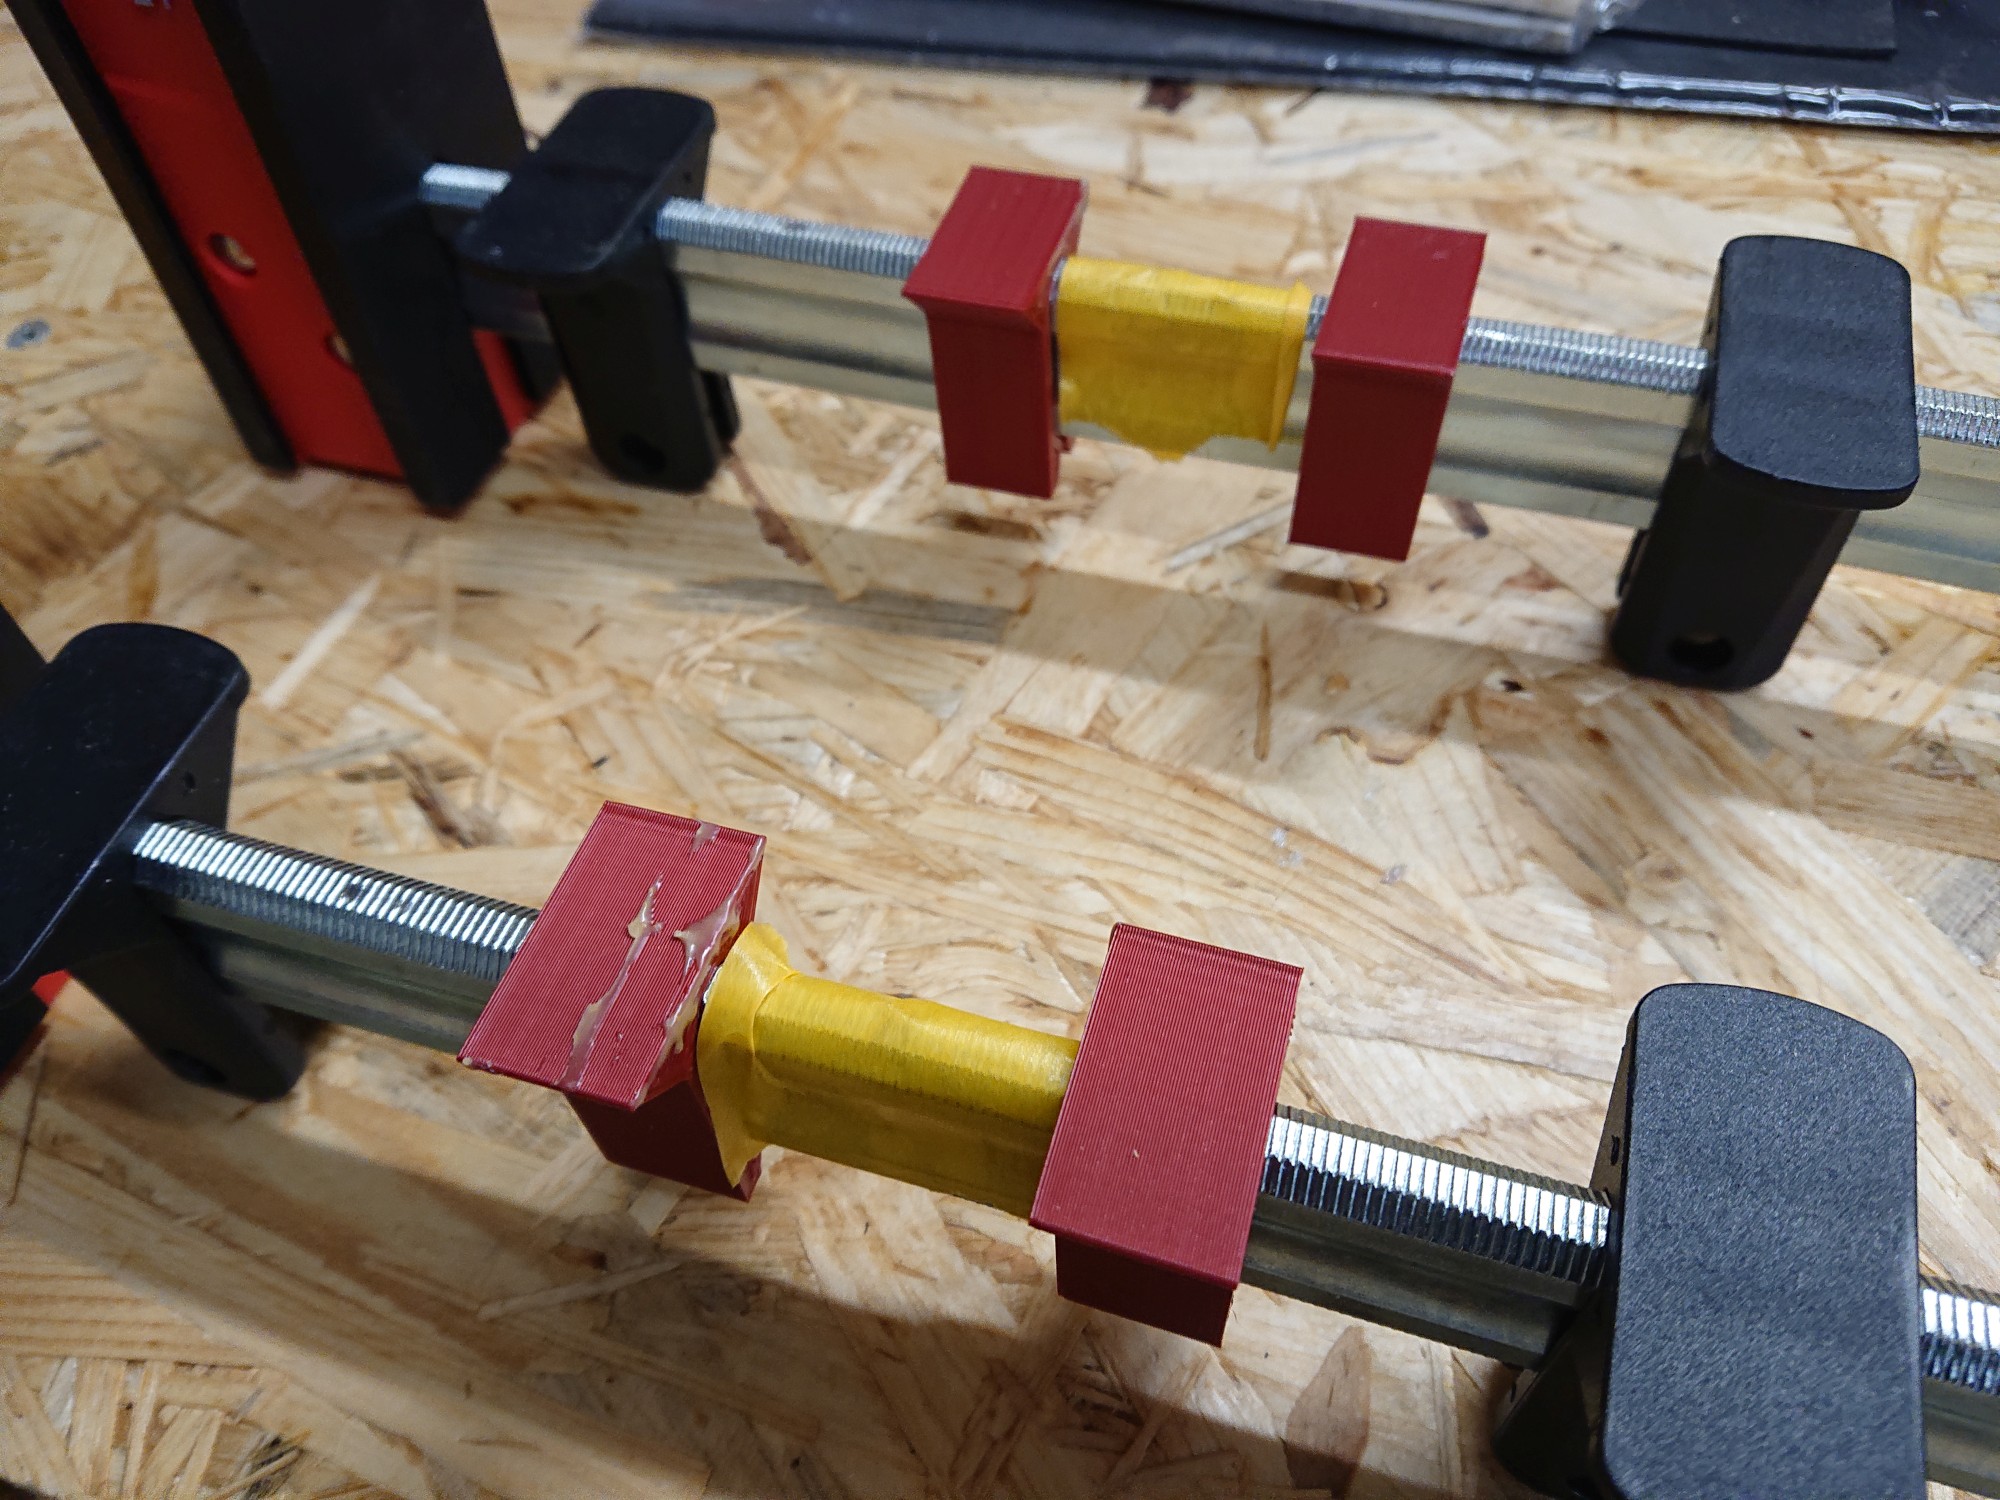
With my miter saw, the boards were cut to size in no time. Then the boards were glued together, where my body clamps came in handy once again. By the way, you should protect the clamps with masking tape in the places where the joints are, otherwise the glue will drip on them. And getting rid of it is not so easy. Since the wood was not really straight, as already written, I pressed it straight with a shim and a few more clamps while gluing. That worked to some extent, but was enough. Don’t forget to tape off the shims with masking tape or similar, otherwise they will stick to your boards and you won’t be able to get them off.


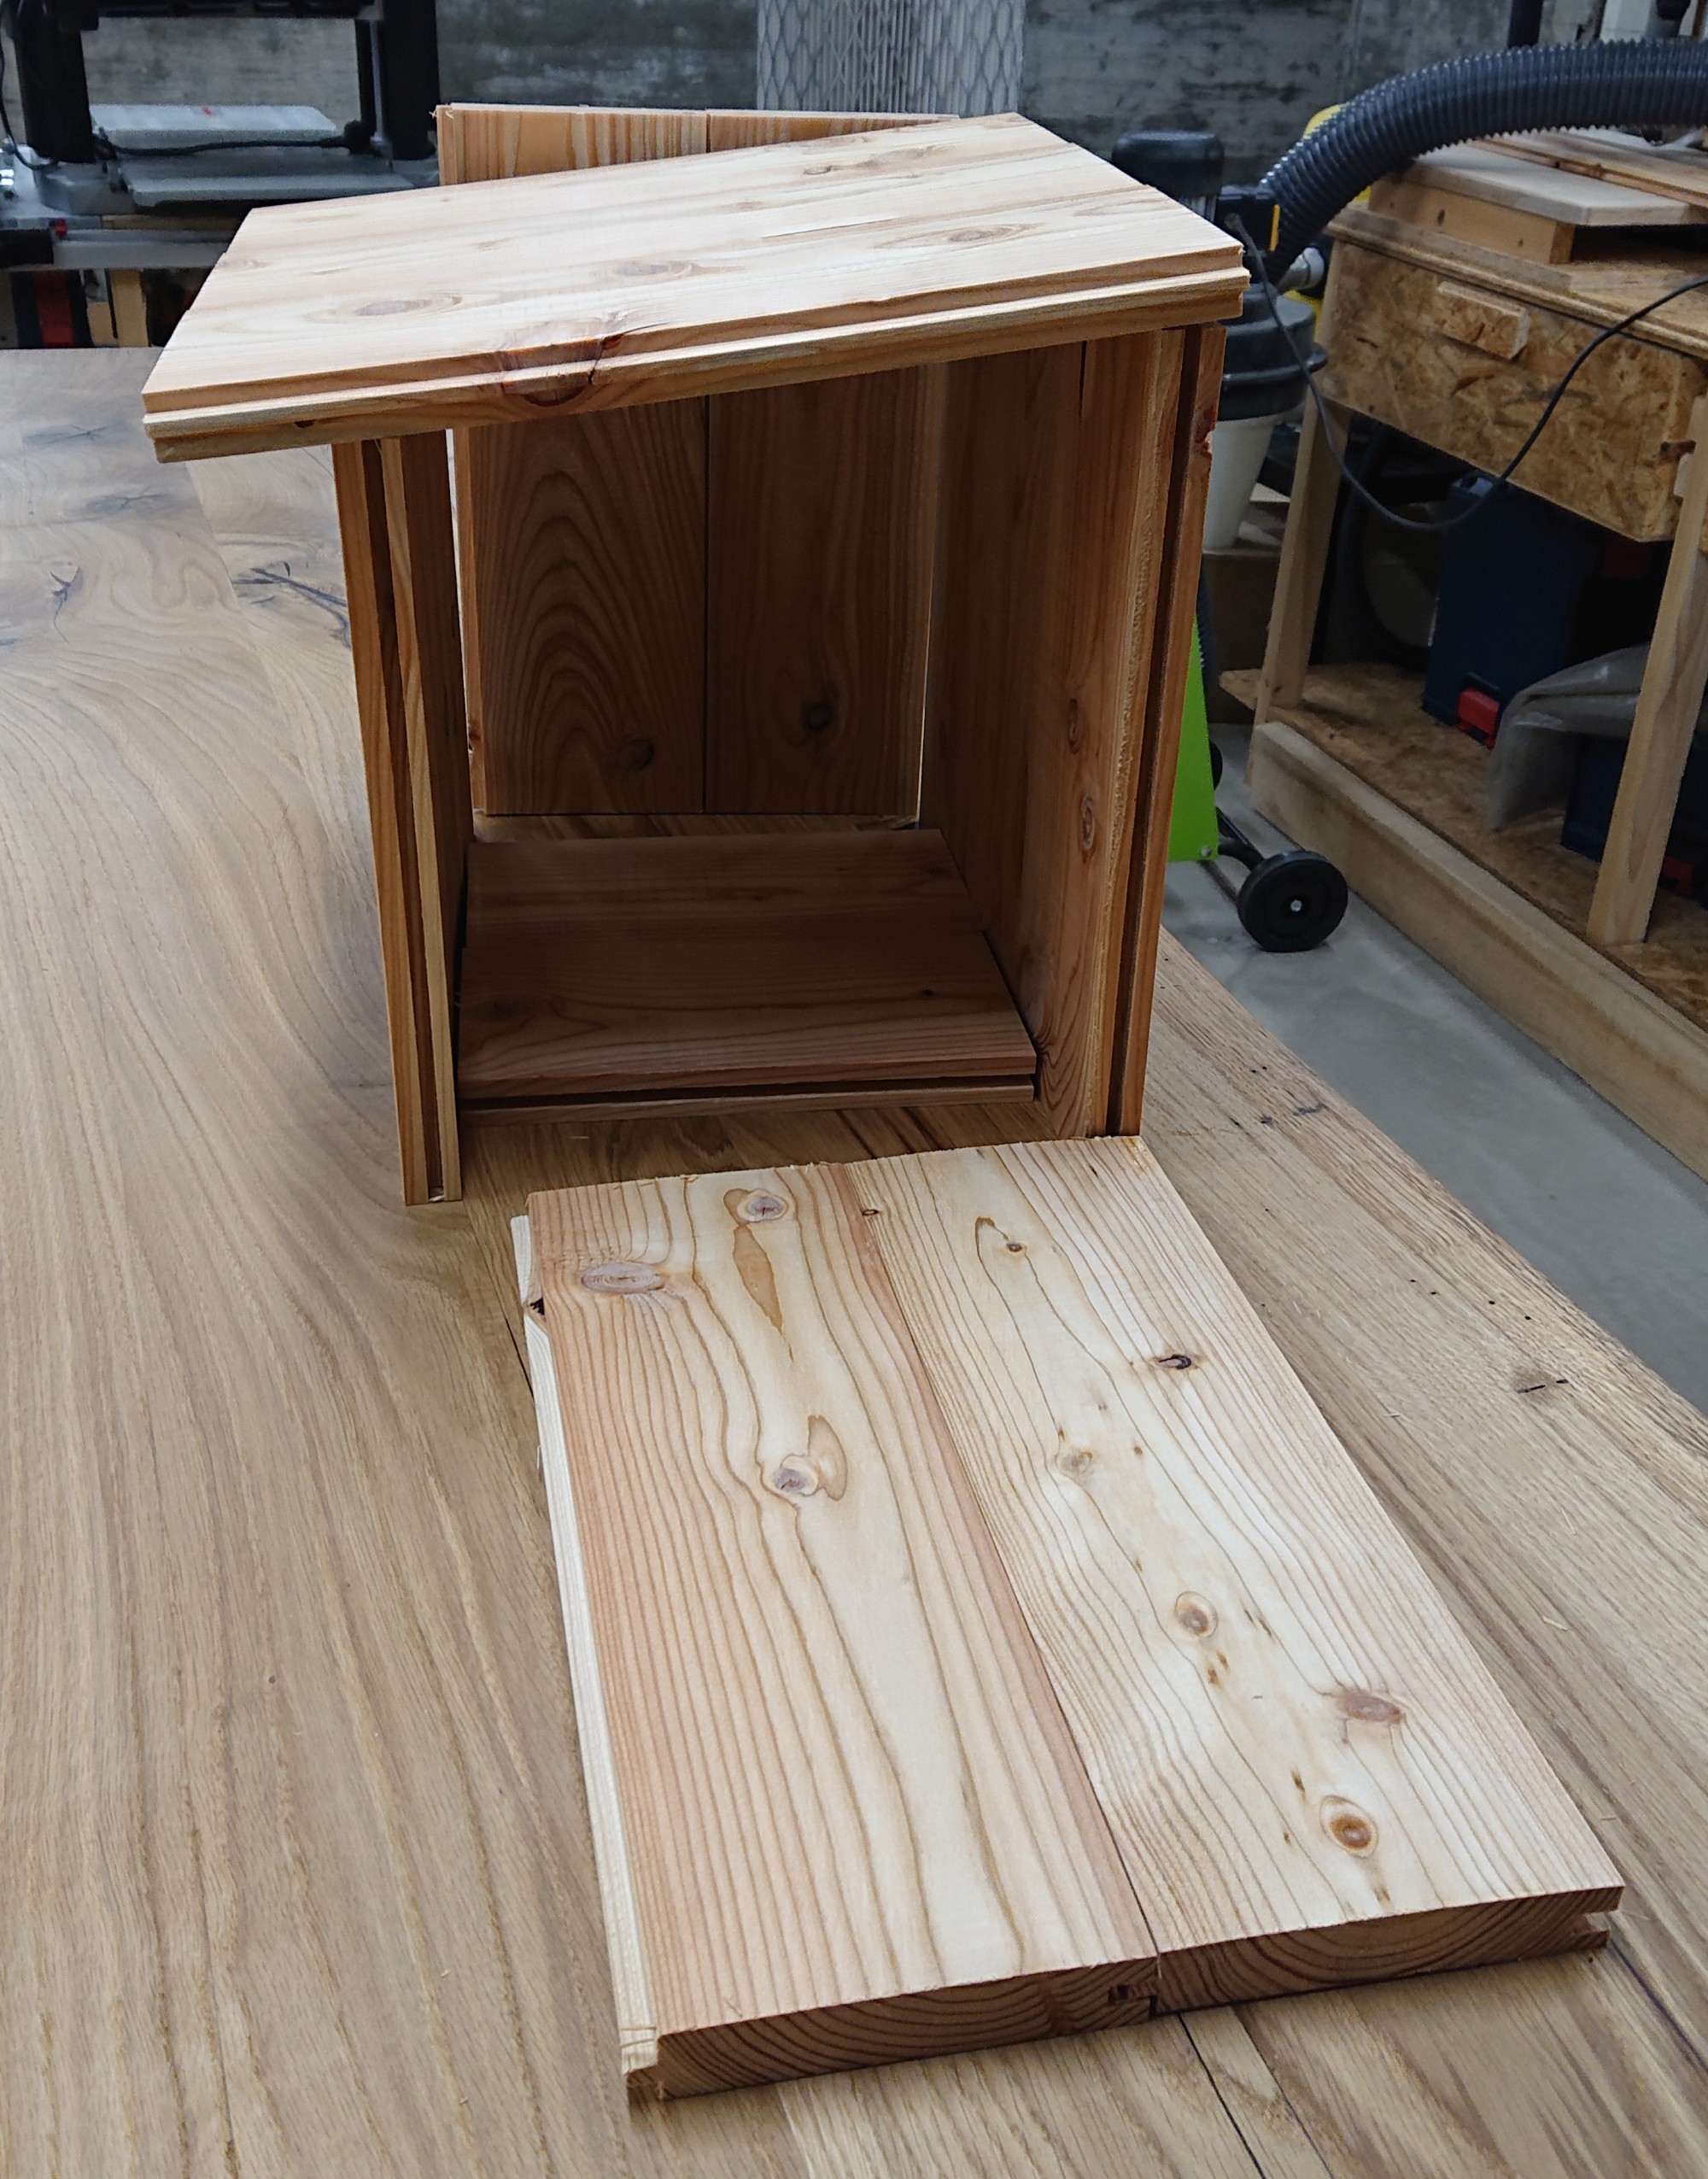
After gluing, I put the whole thing together provisionally to see if everything fits. As you can see, the front is a little lower than the back wall, so the top slopes slightly. After that, the boards were sawed to their final dimensions and the various holes were pre-drilled and countersunk. I moved the bottom completely inward and the side walls inward as well, meaning the front and back walls are screwed on. The sides have to be sawed at a slight angle at the top to match the slope of the roof.

After that, the two entry holes were drilled. Any circle cutter or hole saw can be used for this. For a squirrel burrow, the holes should have a diameter of 8 cm. There should be two holes, so the squirrels always has an escape hole if an enemy waits on one. I rounded the edges of the holes slightly with my edge router. The lid is screwed tight with simple hinges. Make the lid hinged so that you can easily clean the construction at any time. Outside, a few strips and boards are added, so that the squirrels can easily climb in and out. But this is not a must.

If you don’t want to install a webcam, you are now ready and only have to think about where and how you want to mount it. Below I describe my solution.
Electrical gimmicks
If you know me, you know that I like some extra gimmicks. Wouldn’t it be cool to watch the little offspring grow up? So I had to get a webcam. The camera had to fulfill the following features:
- Night vision
- adjustable focus
- IP camera without the need of a cloud service for streaming
- small
- cheap
Through an article in “Make” magazine I came across the Hikam S5, which is almost identical to the HiKam S6. This one fulfilled all conditions and is available for very little money. As it turned out, however, it must be relatively bright so that the camera does not switch to night vision mode. Even during the day it often was not bright enough, a few clouds were enough to switch to night vision mode. So there had to be some lighting as well. Something that can also be powered by USB. And dimmable, so that the animals do not feel like sitting in a TV studio. The best thing is that it can be switched off time-controlled, after all, the little rascals should have their peace at night.
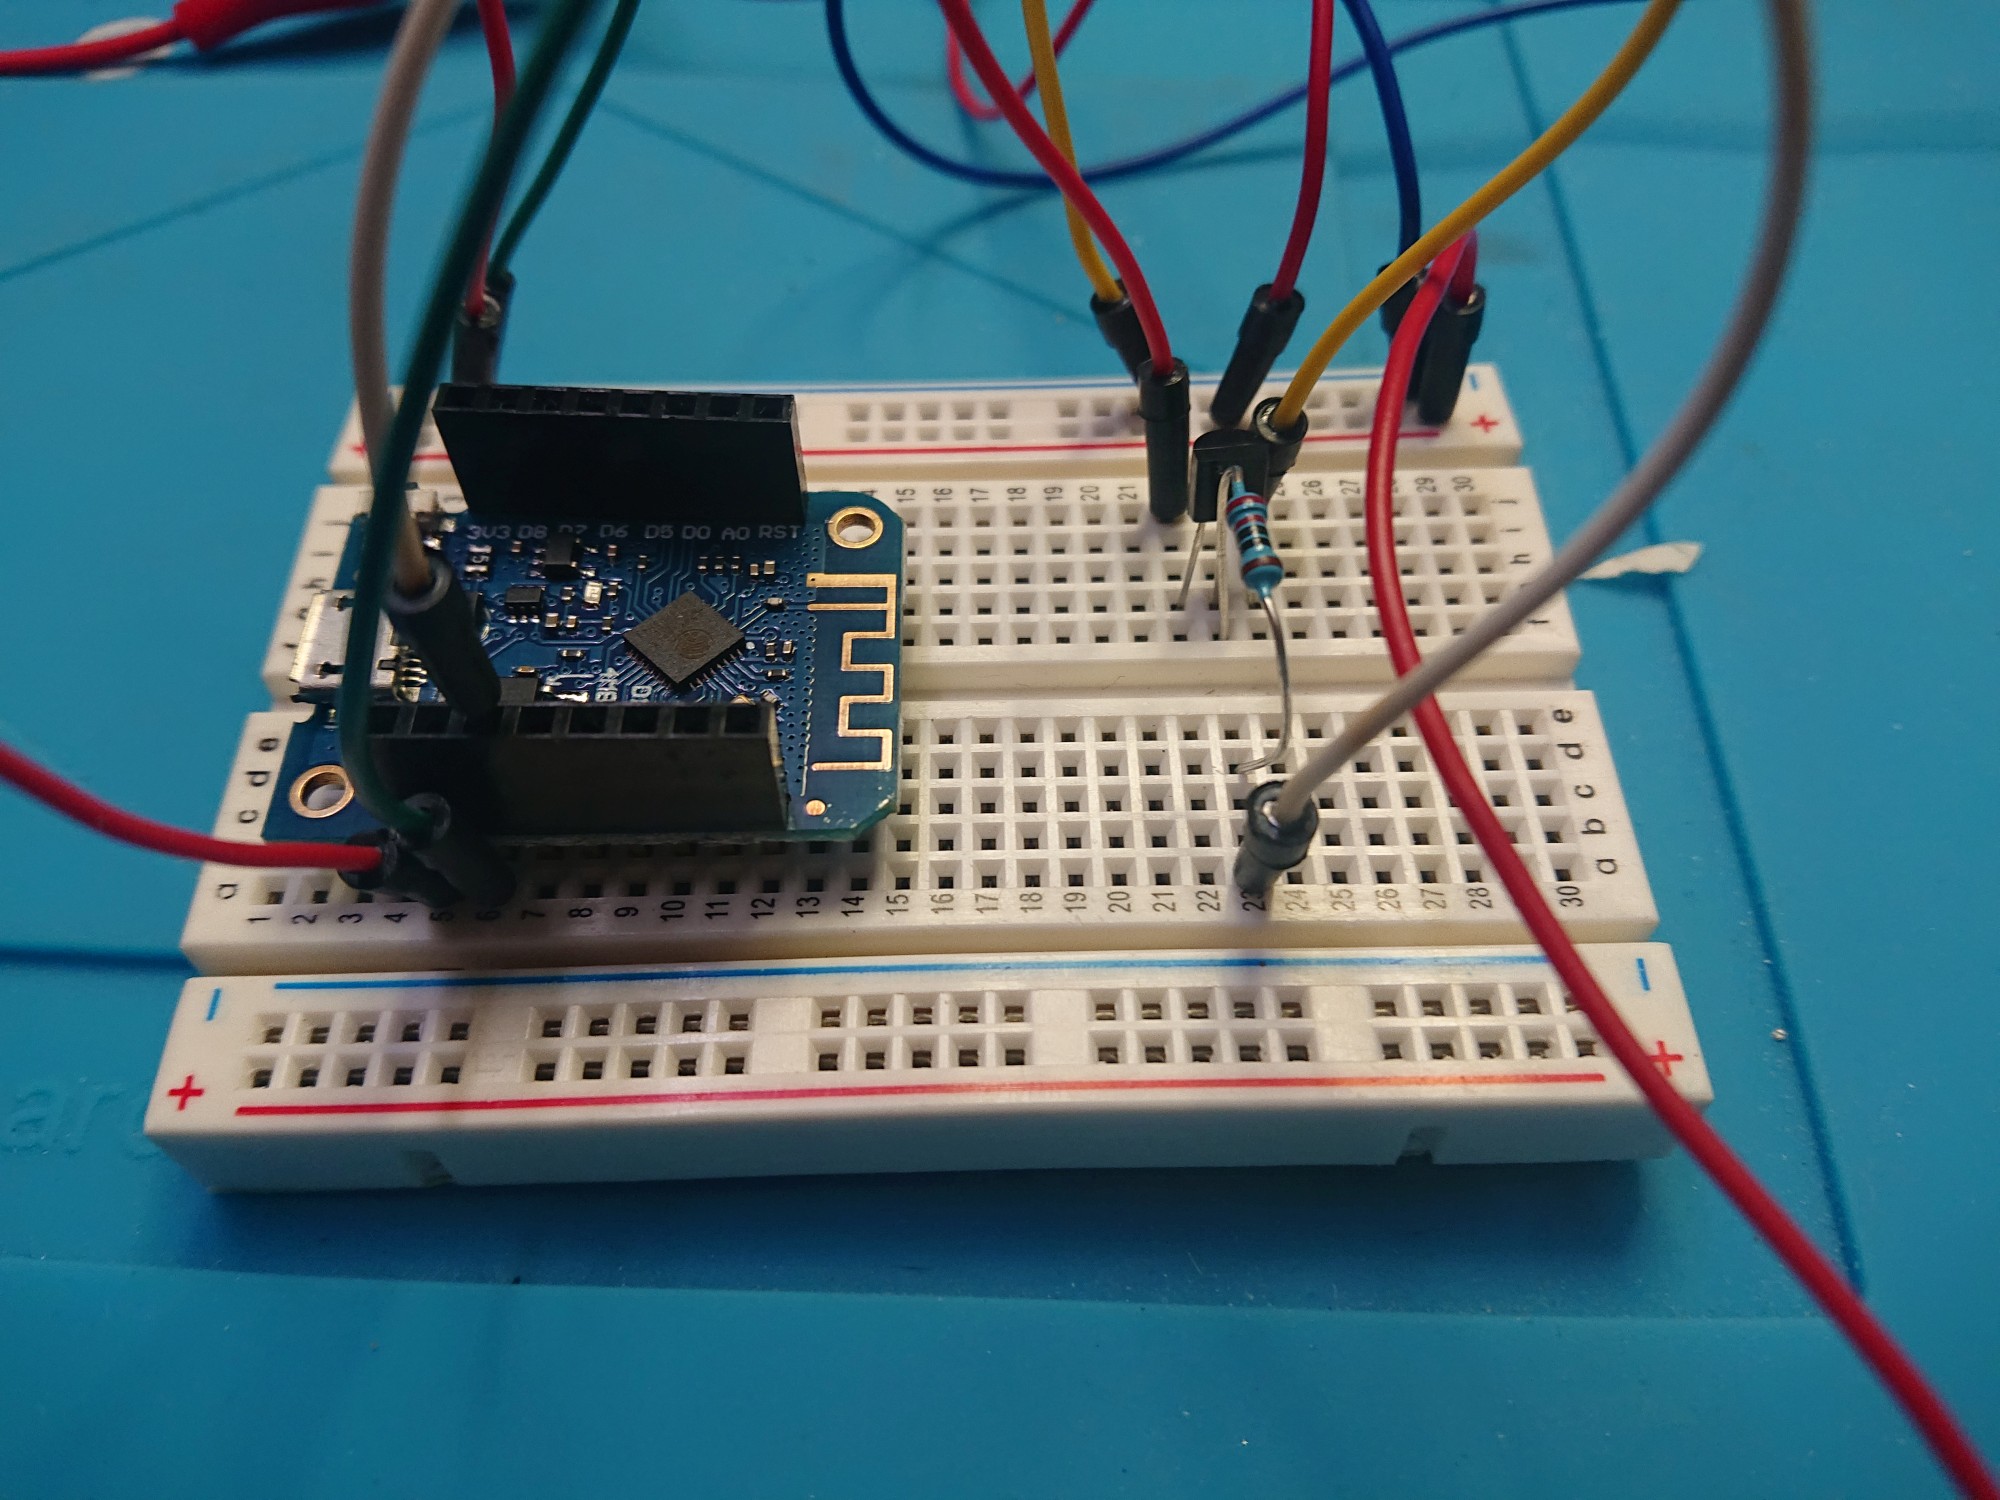
I have not found a ready-made and affordable solution, so I quickly designed something myself. Using dimmable 5V LED strips, WeMos D1 Mini (with Tasmota as firmware) and transistor, I built a lighting controllable via Smart Home. It is slowly turned on 30 minutes after sunrise, so that it is always bright enough and 30 minutes before sunset it is turned off again. From the LED strip I cut a 8cm long strip. That is enough light.

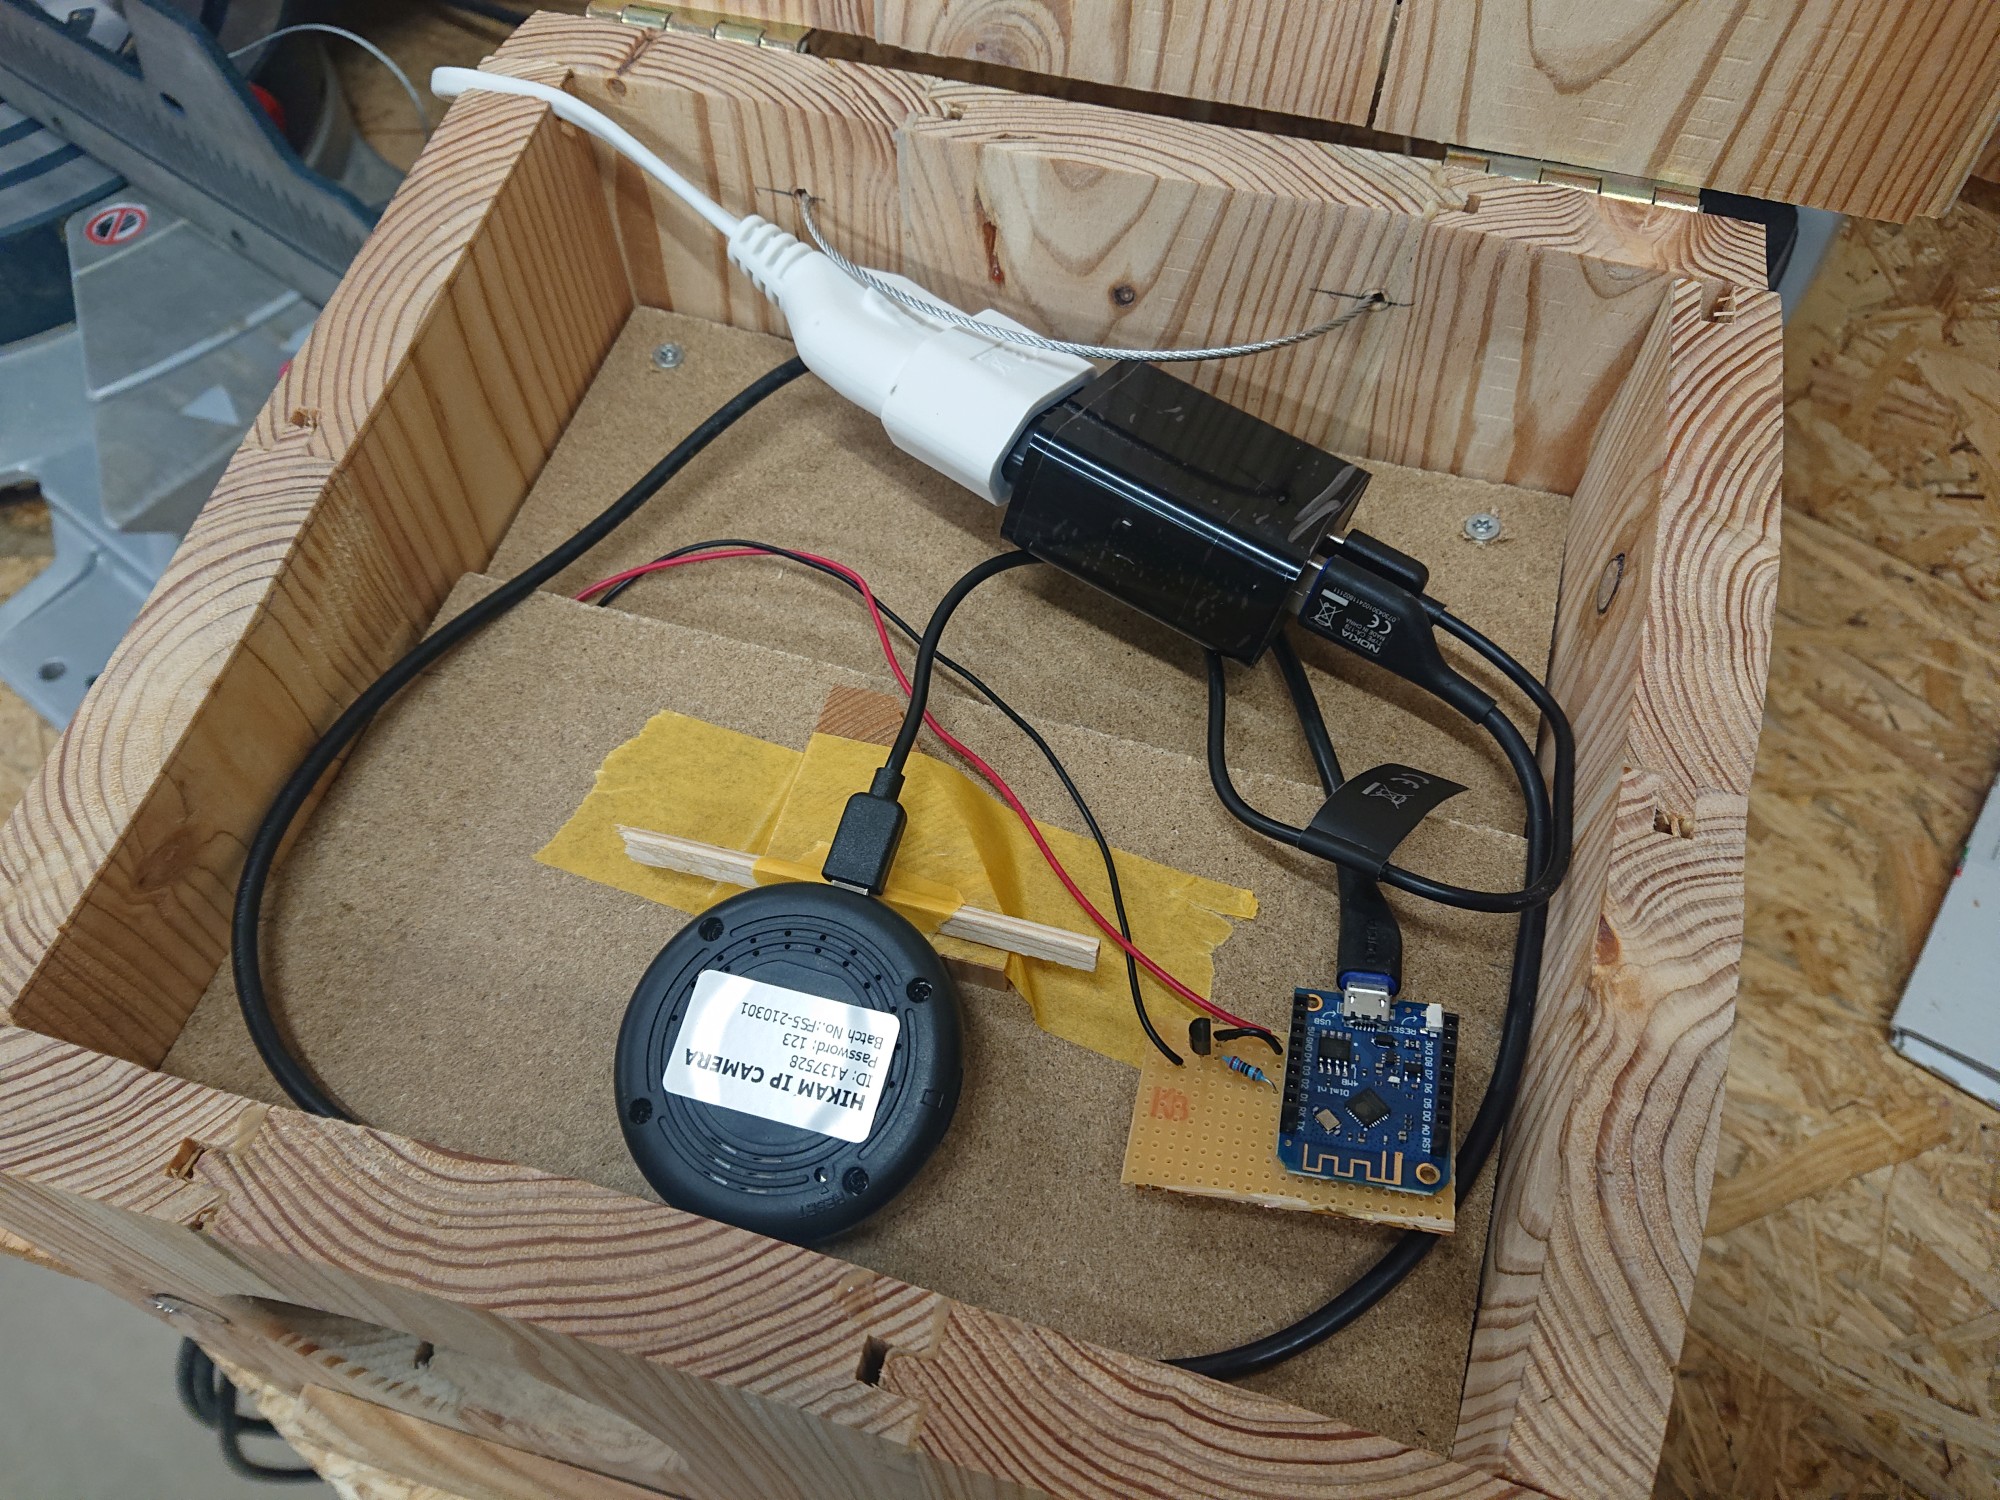
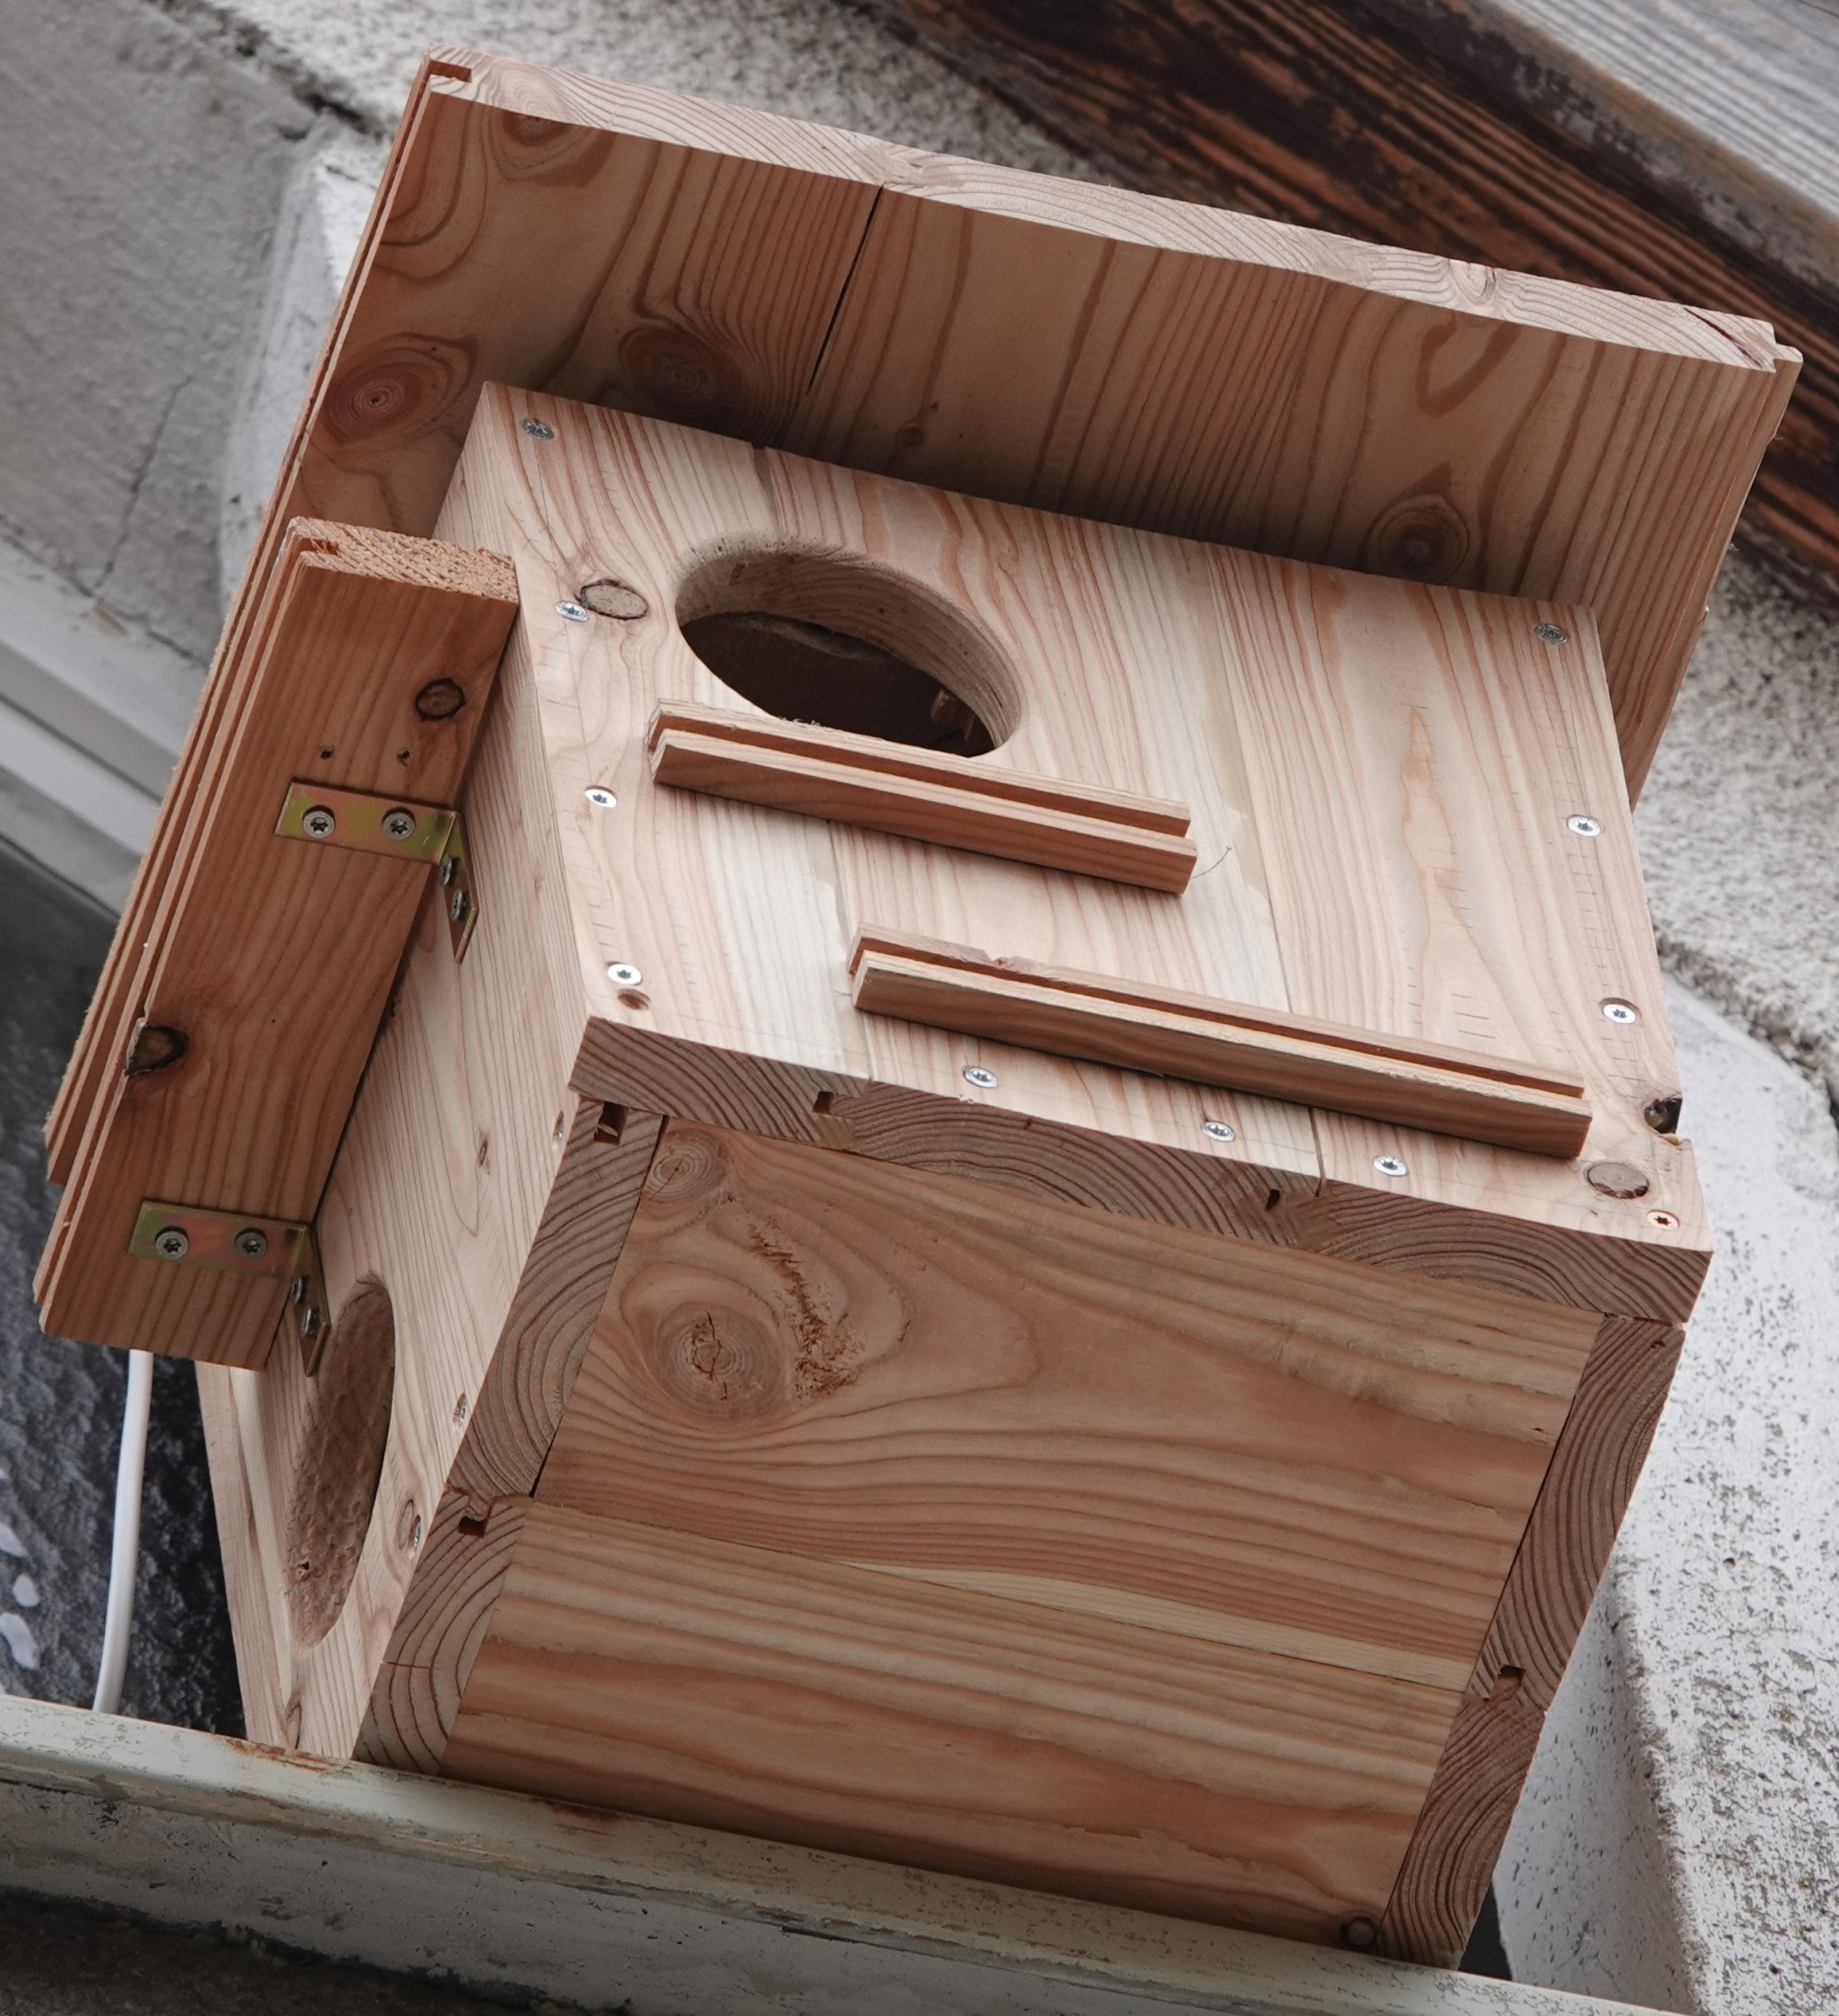
The whole technique will be placed on an intermediate floor in the burrow. A hole for the camera is drilled into it. For the perfect diameter, so that the camera sits tight, I used my spindle grinder. The board, in my case it’s two scrap boards, rests on two small ledges. Luckily I have a Bosch GSR 12V-35 with Flixclick, because the angle attachment really paid off here. OK, with proper planning this wouldn’t have been necessary, but that’s how it went now.


Ready mounted, the whole thing looks like this:
And the complete box, with the illumination


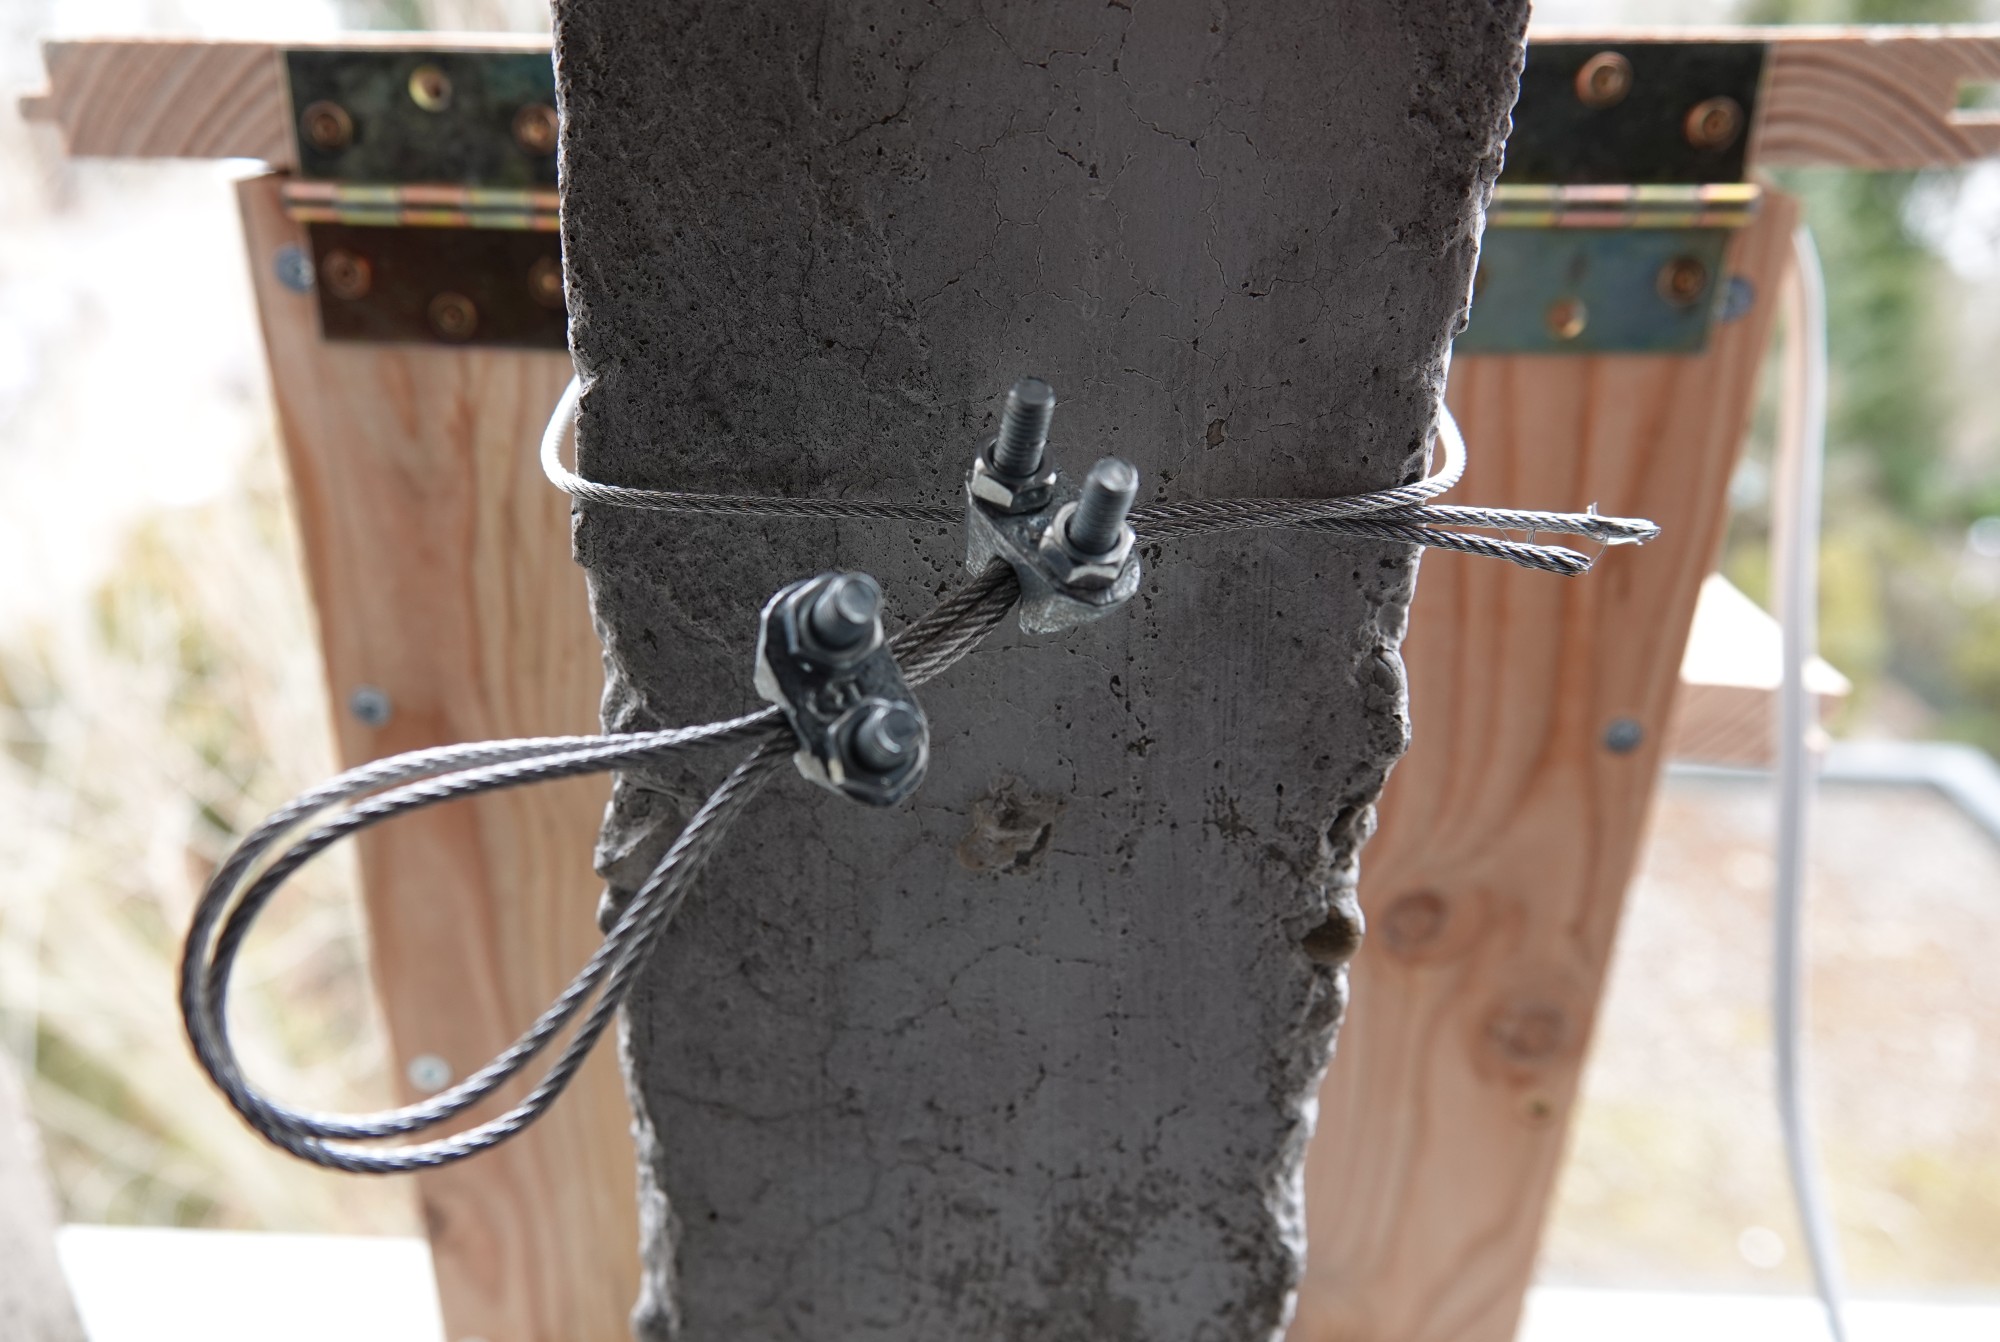
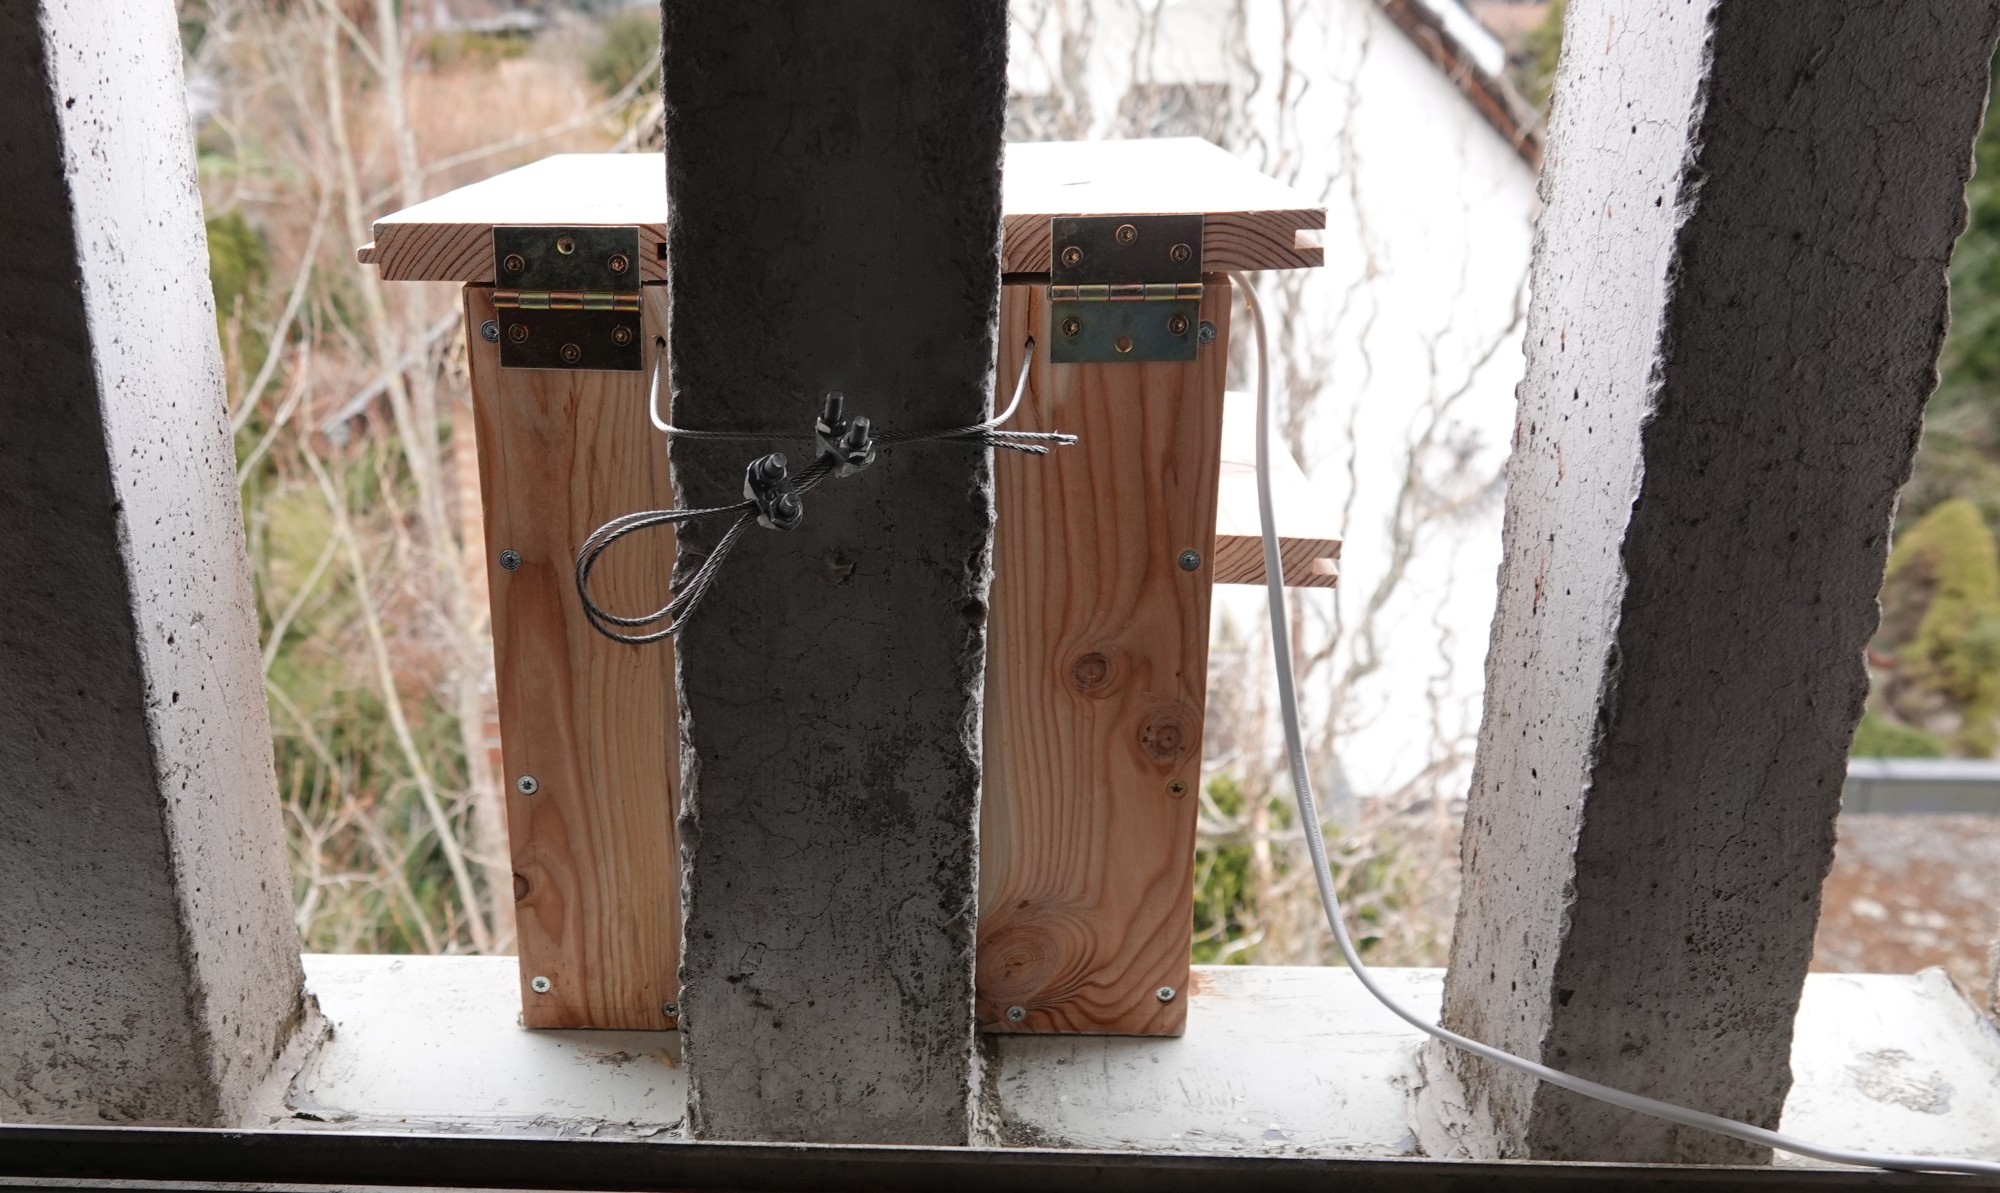
Before the installation I put some straw in the box to make it comfortable. I put the hutch in front of a window in our attic. There the squirrels are safe from enemies such as cats and I have electricity there also to operate the technology. The whole thing is fastened by some wire and wire clamps.
As soon as some guests are inside, I will stream the webcam on my Youtube page and publish it here on the blog.
This is how it currently looks in the burrow:

Downloads and Tools
Construction plan of the Najuversum as a rough building template
- HiKam S5 Webcam *
- UHU Holz Max Tube, D4 Glue *
- Hinges, stainless steel *
- Dresselhaus 4×30 Torx screws *
- CSL 24W USB power supply, 2 Ports *
- Brennenstuhl 5m, extension cable, euro plug*
- 5V LED stripes, warm white, dimmable, 2m *
- AZDelivery Wemos D1 mini micro controller *
- Bosch GCM 12 GDL miter saw, “The Monster” 😉 *
- Bosch GSR 12V-35 FC, cordless screwdriver *
- Bosch GKF 12V-8 edge router *
- ENT Plus router bits, 12 parts *
- Scheppach OSM 600 spindel sander *
- Wolfcraft hole saw *
- Bessey Revo KRE 1000/95 clamps *
- Wolfcraft EHZ 100-150 one-hand clamps *
- Wabeco BF1243 drill stand *
- Metabo BEV 1300-2 drill *
The links marked with an asterisk (*) are so-called affiliate links. If you click on such an affiliate link and buy through this link, I get a commission from the respective online store or provider. The price does not change for you. As an Amazon affiliate I earn on qualified sales.
Be First to Comment